Installing Gnome in OpenBSD 4.8
Notice
This document is aimed at people willing to install the official Gnome package on a fresh and default install of OpenBSD 4.8.
While several other documents exist, I didn’t find one with all the necessary steps. I somehow managed to make it work, so I would like to share this experience with you, if it can make you avoid some hassles.
This document tries to be as precise and accurate as possible. However it may not be perfect, and it is of course possible that it does not work in your configuration. It worked with mine, but your comments, corrections and suggestions are welcome, and this document will be updated accordingly.
This tutorial is quite similar to the previous one. As some users had problems installing 4.8 using my tutorial, I will try to add more details and explanations.
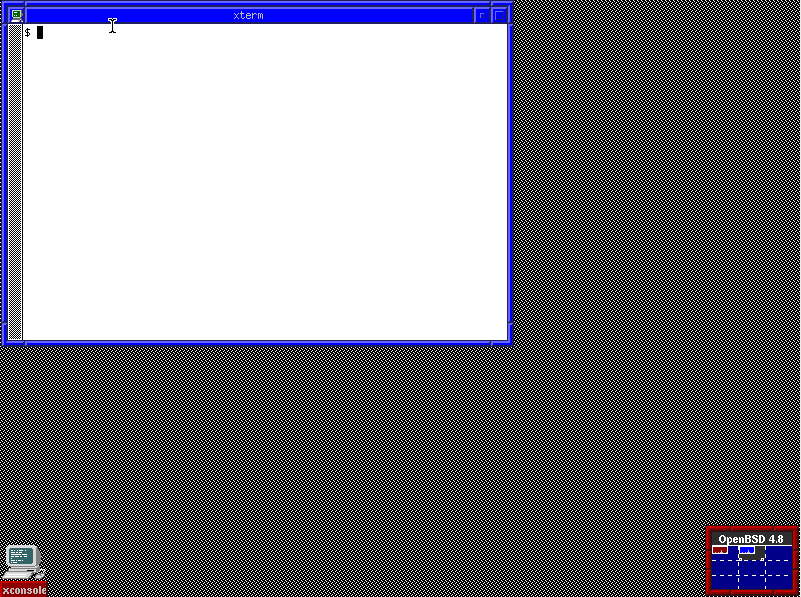
We will pass from this :
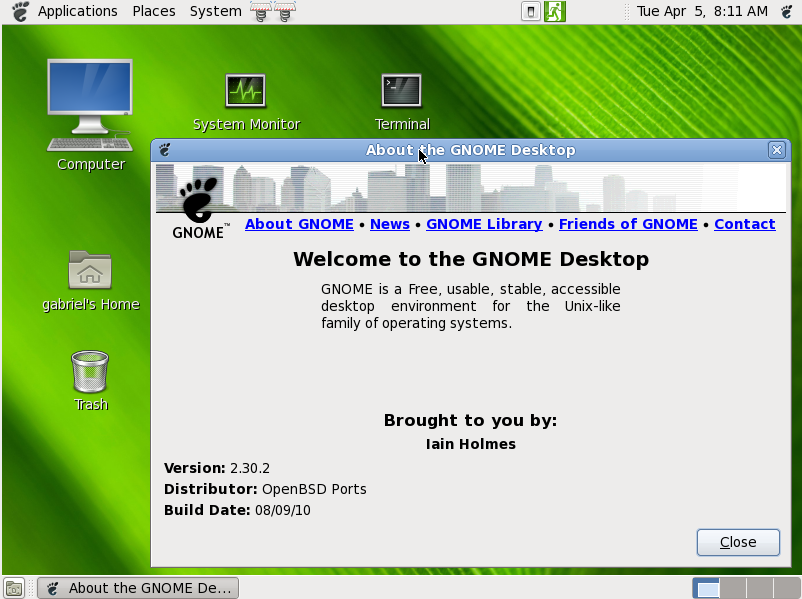
To this:
What is the interest to install Gnome on an OpenBSD system ?
Well the interest is only valid if you plan to make a workstation of OpenBSD (servers don’t need it). As you are reading this article, you are most probably already convinced of the benefits of Gnome. However, if comparing the two previous screenshots didn’t convinced you yet, there are several advantages to install Gnome on top of OpenBSD for a workstation:
- A workstation should be responsive
- A workstation should not be bloated with unused applications
- A workstation should be secure
- A workstation should be stable
- A workstation should be simple
- A workstation should be user-friendly
- A workstation should be easy to maintain and upgrade
OpenBSD + Gnome can do just that. More, OpenBSD permits to install a recent operating system on machines you’d think they are outdated. 128MB of RAM and 4GB of hard disk space should be enough for OpenBSD+Gnome.
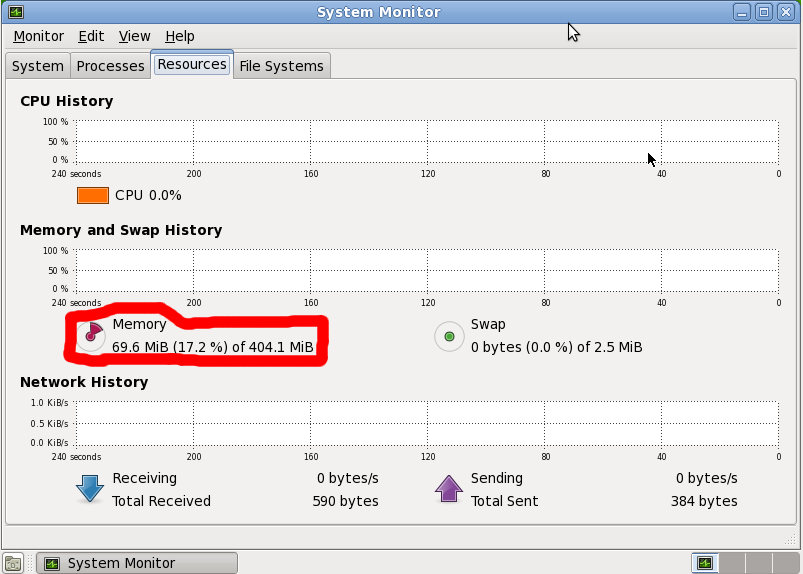
If you are not convinced, you can have a look at the following screenshot concerning OpenBSD memory usage after I booted:
That’s right! OpenBSD just uses about 70 MB of RAM with Gnome! And that’s even a lot for an OpenBSD system.
Ready? Let’s go!
After a fresh default install of OpenBSD 4.8 (read this if you don’t know how to install it), open a terminal (xterm by default).
First, make sure that you are in your home directory :
$ pwd
It should display /home/your_user_name/. If not, cd to your home directory.
Then become root :
$ cd ~your_user_name
$ su
Note: I advise you create a cache for the downloaded packages (specify a location with sufficient free space, 2.5 GB will not be too much) for easy and fast re-installation in case something goes wrong. To create the cache directory, type the following command :
# mkdir /path_to_your_pkg_cache
Then set and export the PKG_CACHE environment variable :
# export PKG_CACHE=/path_to_your_pkg_cache/
You can install the nano text editor for a convenient editing of config files (optional step, you can use vi if you prefer) and set the nowrap mode to avoid the automatic creation of new lines, which is an undesirable behavior:
# pkg_add http://ftp.openbsd.org/pub/OpenBSD/$(uname -r)/packages/$(uname -m)/nano-2.2.4.tgz
# echo 'set nowrap' > /root/.nanorc
# exit
$ echo 'set nowrap' > .nanorc
$
If you are new to OpenBSD, the pkg_add command is used to install a package into your system. If you come from Linux, you probably know some commands such as apt-get, aptitude, emerge, etc.
Its most useful arguments are -v, -vv, -vvv, -vvvv, -vvvvv which represent the verbosity level of the command output; -i which enables the interactive mode; the path to the package comes last.Let met also explain briefly the uname command.
In the previous pkg_add line, I used uname -r and uname -m. The first will output the version of OpenBSD (4.8 in my case) and the second command outputs the architecture (amd64 in my case).
For more detailed informations about these commands, do not hesitate to use the man command with the command name in argument.
You can use another URL for the pkg_add line, if you find that another mirror is faster.
Now we should set the PKG_PATH environment variable so that the pkg_add command knows where to search for the packages and to save us from typing the full mirror URL at each command. This is done in the .profile file located in your home directory :
$ nano .profile
Append/modify the following lines :
PKG_PATH=http://ftp.openbsd.org/pub/OpenBSD/$(uname -r)/packages/$(uname -m)/
ALT_PKG_PATH=http://ftp.chg.ru/pub/OpenBSD/$(uname -r)/packages/$(uname -m)/
PKG_CACHE=/path_to_your_pkg_cache/
export PKG_PATH ALT_PKG_PATH PKG_CACHE
Take extra-care to specify two different and fast mirrors if you don’t want to wait two days at each pkg_add command…
CTRL+X, Yes, Enter will save the file and close nano.
Let’s do the same for the root account :
$ su
# nano /root/.profile
Append/modify the following lines :
PKG_PATH=http://ftp.openbsd.org/pub/OpenBSD/$(uname -r)/packages/$(uname -m)/
ALT_PKG_PATH=http://ftp.chg.ru/pub/OpenBSD/$(uname -r)/packages/$(uname -m)/
PKG_CACHE=/path_to_your_pkg_cache/
export PKG_PATH ALT_PKG_PATH PKG_CACHE
CTRL+X, Yes, Enter will save the file and close nano.
Reboot :
# reboot
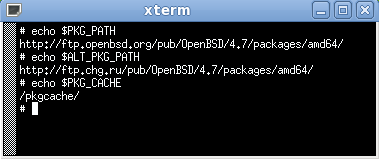
In addition, you may type the 8 previous lines directly in the terminal if you don’t want to reboot now, so that the environment variables are updated. After reboot, you can check by typing the following commands :
$ echo $PKG_PATH
$ echo $ALT_PKG_PATH
$ echo $PKG_CACHE
$ su
# echo $PKG_PATH
# echo $ALT_PKG_PATH
# echo $PKG_CACHE
Following the suggestion of Peter Ljung in his comment, please note that it is not compulsory to add the version number and the file extension of the package in your pkg_add lines.
I always specify the full package path because my connection is slow and this way pkg_add does not have to search for the correct version number. When you don’t add the version number, pkg_add will download the full package listing, which can consume a lot of time if you are on a slow connection, especially if the package you are installing has a lot of dependencies.
For example, the following pkg_add lines are also valid if you want to install nano. If PKG_PATH is not yet set:
# pkg_add http://ftp.openbsd.org/pub/OpenBSD/$(uname -r)/packages/$(uname -m)/nano
If PKG_PATH is already set, you can simply type :
# pkg_add nano
I guess that you now feel the interest of setting PKG_PATH, don’t you ? 🙂
If you want to know the full package filename, just go to the packages root path and note the full filename of the package. In my case I had to go to http://ftp.openbsd.org/pub/OpenBSD/4.8/packages/amd64/. You have to go to the right packages root path related to your architecture and OpenBSD version.
The environment is now ready for Gnome. Here is the command to install Gnome itself :
# pkg_add -i -vv gnome-session-2.30.2p3.tgz
Then wait possibly few hours if you are on a slow connection like me… Or a few minutes if you have a fast Internet connection.
At this point, your $PKG_CACHE directory should contain at least the following packages:
Done ? Let’s continue with the installation of the Gnome Display Manager (gdm):
# pkg_add -i -vv gdm-2.20.11p1.tgz
At this point, your $PKG_CACHE directory should now contain:
Next, we have to edit a configuration file that will start GDM after a successful boot.
# nano /etc/rc.local
Append/modify the following lines in /etc/rc.local:
if [ -x /usr/local/sbin/gdm ]; then
echo -n ' gdm'; (sleep 5; /usr/local/sbin/gdm) &
fi
CTRL+X, Yes, Enter will save the file and close nano.
You probably want to start Gnome Desktop automatically at startup and use the Gnome login screen. If yes, type the following commands:
# echo 'exec gnome-session' > /root/.xinitrc
# chmod +x /root/.xinitrc
# exit
$ echo 'exec gnome-session' > .xinitrc
$ chmod +x .xinitrc
At this point, if you restart, you may be able to see the Gnome login screen, although there are high chances that you will still restart in xdm and FVWM. But don’t restart now because we are not done yet.
There are still some missing important packages to install : metacity, gnome-panel and nautilus. Without them, you will not be able to do much things but watching the default Gnome wallpaper (except if you like empty screens)…
So let’s install the missing packages.
If some choice between libraries are to be made, just choose the first one by typing 0 validated by Enter.
su
# pkg_add -i -vv metacity-2.30.1p1.tgz
# pkg_add -i -vv gnome-panel-2.30.2p2.tgz
# pkg_add -i -vv nautilus-2.30.1p2.tgz
There are good chances that if you reboot, xdm is still started, and/or the FVWM window manager is still displaying instead of Gnome Desktop. So do the following :
# nano /etc/rc.conf.local
Append/modify the following lines :
xdm_flags=NO
gnome_enable=YES
gdm_enable=YES
If you want, you can now start Gnome by rebooting or typing:
$ startx
(you don’t need to be root)
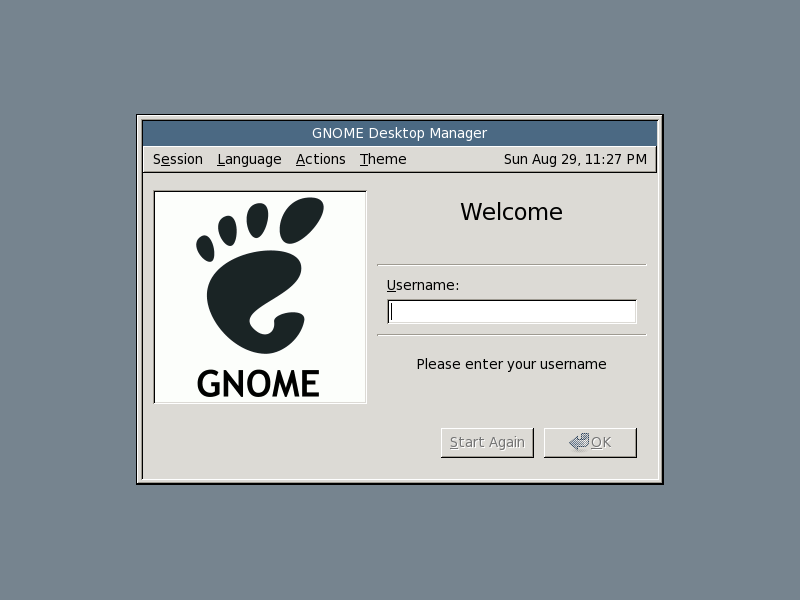
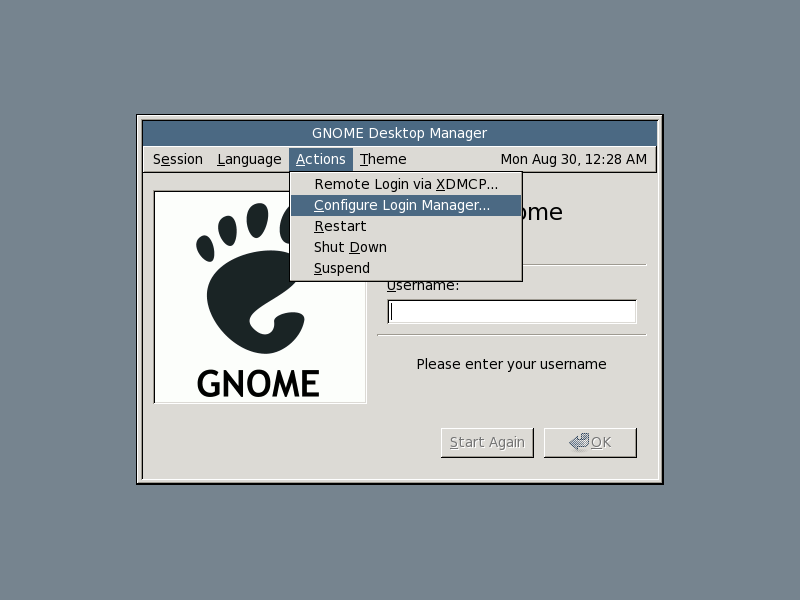
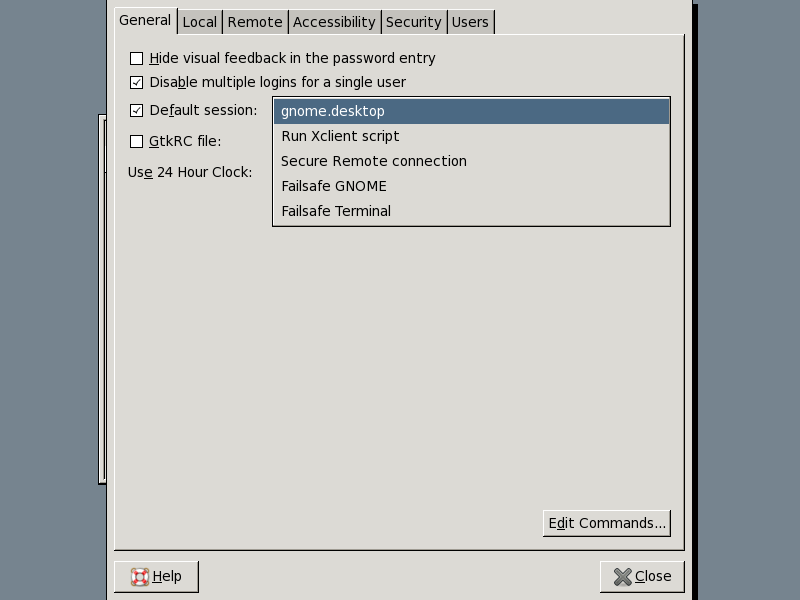
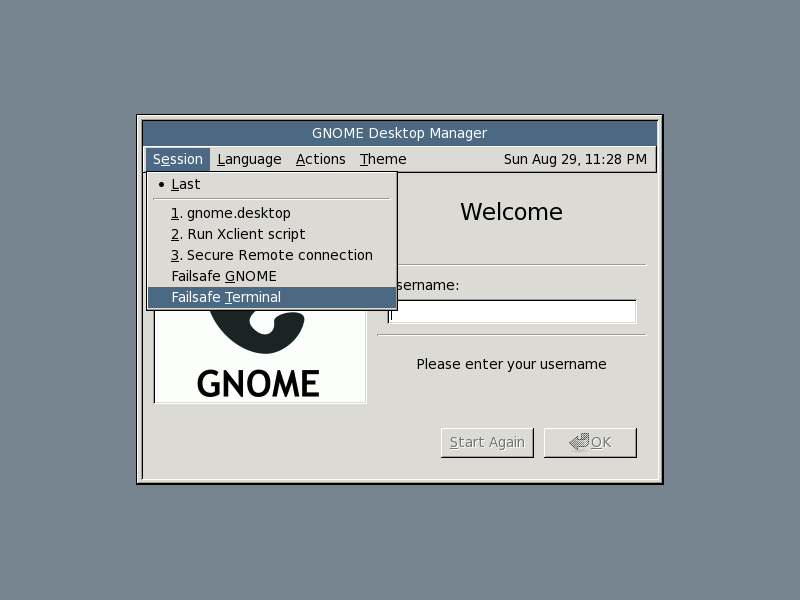
Be sure to select Gnome Desktop at the Gnome login screen, and to set it as the default one when asked ! If you missed it, you still can do it in the Gnome login screen by going in the menu Actions > Configure login manager… and checking and choosing the default session in the General tab. If you cannot use your keyboard in the Gnome login screen, see the Troubleshooting section.
At this point, Gnome should be able to start. However you don’t even have the gnome-terminal package installed, which is not very convenient to add some packages…
More, maybe the keyboard will not work and no title bars will be displayed, that is kind of an issue if you aim to produce a usable computer…
So I strongly advice you install some few packages to solve these issues.
You can still use the Gnome failsafe terminal from the Gnome login screen if you can’t get an access to xterm.
Installation of useful packages :
$ su
# pkg_add -i -vv gnome-terminal-2.30.2p0.tgz
# pkg_add -i -vv gnome-control-center-2.30.1p0.tgz
# pkg_add -i -vv gnome-menus-2.30.2p0.tgz
# pkg_add -i -vv gnome-settings-daemon-2.30.2p1.tgz
# pkg_add -i -vv gnome-themes-2.30.2.tgz
# pkg_add -i -vv gnome-themes-extras-2.22.0p8.tgz
# pkg_add -i -vv gnome-utils-2.30.0p0.tgz
# pkg_add -i -vv gnome-applets2-2.30.0p2.tgz
# pkg_add -i -vv gnome-system-monitor-2.28.1p3.tgz
# pkg_add -i -vv gnome-nettool-2.30.0p0.tgz
The PKG_PATH environment variable may not be set if you type this line from the Gnome failsafe console, so you can type the 8 lines concerning PKG_PATH before, or just type the full mirror url if unlike me you like to waste your time.
Finally, reboot and enjoy your Gnome !
# reboot
Gnome Desktop is now installed and running along with Gnome Window Manager on the most secure OS available. Nice, isn’t it ?
Finally you can customize your Gnome desktop, for example you may want to change the screen resolution, and use it as an OpenBSD workstation or whatever use you can find.
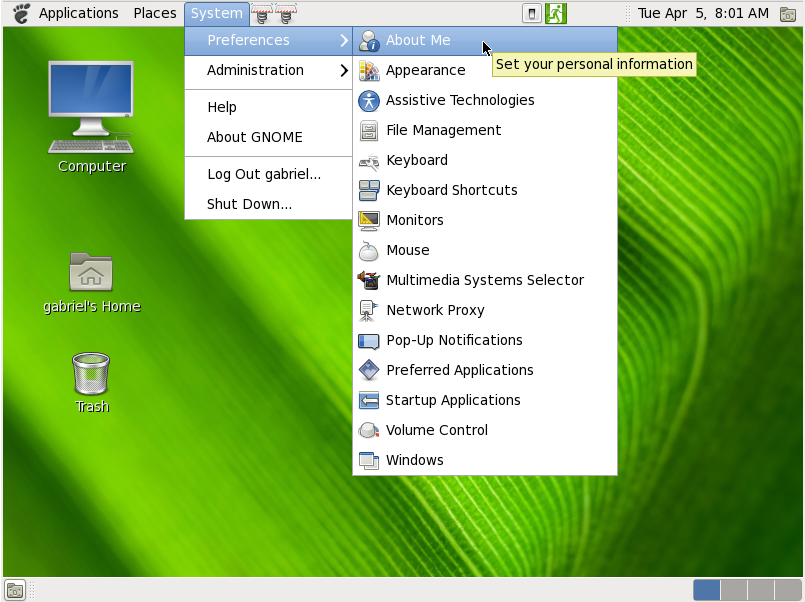
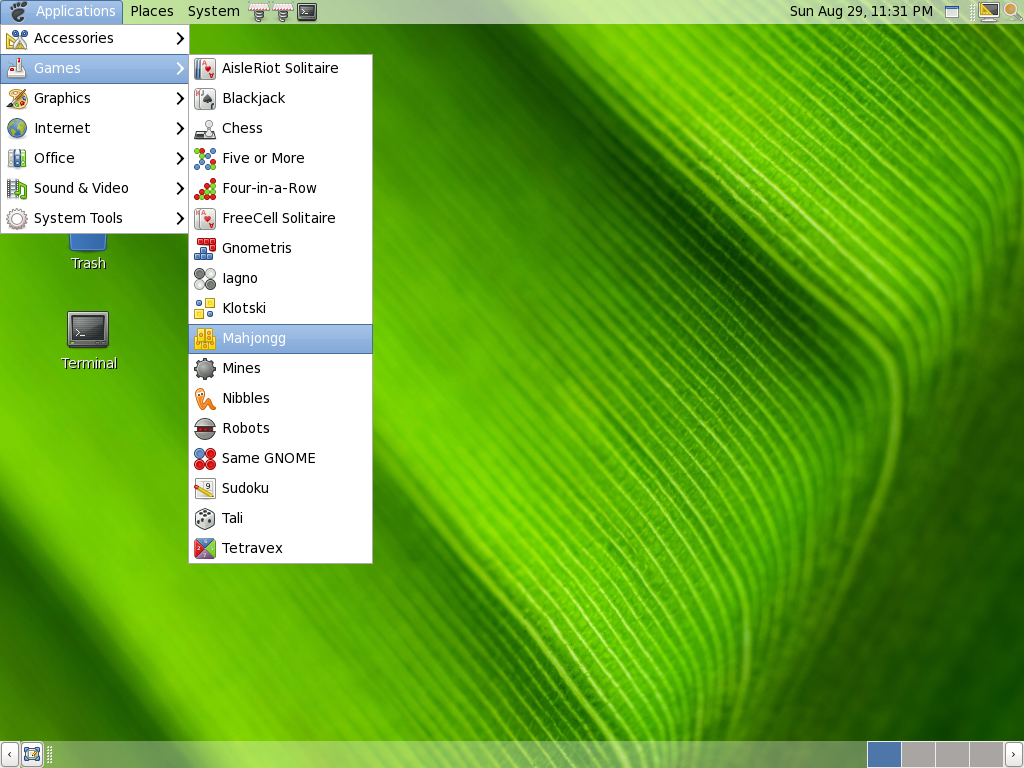
Some screenshot of Gnome Desktop 2.30 running on OpenBSD 4.8 for the pleasure :
Troubleshooting and FAQ
Q : My keyboard does not respond in the Gnome login screen, I can’t type my username and password !
A : It happened to me also. In the Gnome login screen, simply choose Actions > Remote login via XDMCP, then click Cancel once the remote login screen is loaded, you will return to the Gnome login screen and hopefully the keyboard will work ! (Or at least it worked for me)
Q : Why is your xterm window more beautiful than mine ?
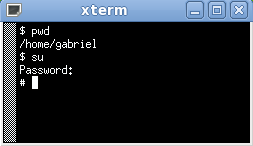
A : Because I took the screenshot in a Gnome Desktop session. But is it important ?
Q : Why do you install Gnome on OpenBSD in the first place ?
A : And why not ? OpenBSD is the perfect candidate for a workstation machine : secure, stable, not bloated with 3000 widgets. Of course one wouldn’t work on a worskstation if it is not a minimum beautiful and convenient. Gnome is here to correct this problem. I have nothing against FVWM for a terminal station, but I definitely prefer Gnome as a workstation user interface.
Q : Do you plan to make a similar tutorial for KDE ?
A : No, I don’t plan to use KDE in its current version, not because it is bad (it’s good actually) but simply because I prefer Gnome.
Q : How to install OpenBSD ?
A : Get the iso, then just burn the install48.iso file to a CDR, reboot and press Enter a few times. Here it is, you just installed OpenBSD! For detailed informations, you can check this tutorial: http://www.gabsoftware.com/tips/tutorial-how-to-install-openbsd-4-8-step-by-step/.
Q : Is your document also valid for FreeBSD or NetBSD ?
A : I don’t know. Most probably not. But you can try and tell me your findings.
Finally
Here it is, this is the end of this document and I hope it will help someone as much as it would have helped me if I found it when I needed it !
Regards,
Gabriel Hautclocq





Merci.
De rien, ça fait plaisir 😉
WOW!
You saved my life 😀
The only tutorial that fully works OMG thx so much
Regards from Brazil!
You’re welcome! I’am glad it helped you 🙂
Some of the “useful” packages from gnome I can’t install. Maybe they updated, I doubt, but gnome-menus and control-center were not found on ftp.
I can find them both in http://ftp.openbsd.org/pub/OpenBSD/4.8/packages/amd64/
There was an error on the gnome-control-center version, now corrected.
Great tutorial, thanks for taking the time to make it.
Go raibh maith agat.
@Terence: I’m glad you found it useful!
Great work Gabriel, Really NICE !!!
One question: after installing gnome on openBSD 4.8,
I don’t find how I can access to my home directory and navigating through directories and files !!!
How can we make this done? further packages to install ?
Fixed the issue its the pckg nautilus… That you already talked about but I didn’t see it 🙂
@Kopenbsd: That’s nice that you can find the issue by yourself, I was too slow to answer 🙂
Again respect Gabriel for that impressive work …
I have followed this guide, and my system boots to the GNOME login screen, but after logging in my default desktop is the standard X11 environment. If I manually exec gnome-session from xterm, GNOME starts (and works), but the X11 environment is still shown on top of the GNOME desktop. Am I missing something?
@Will R: Yes you probably missed something. You might want to check if Gnome is selected as the default session in Gnome login screen 😉 If you follow exactly what this guide tells, you should be able to have Gnome automatically started. If not, then maybe it’s my tutorial who is missing something. If that is the case then I would be happy to correct it 🙂
In /etc/rc.local, I removed the if statement and added this line:
/usr/local/bin/gdm -nodaemon &
After a reboot, the system starts at the command prompt, and running startx after logging in takes me directly into GNOME. This is my preferred behavior. Source: http://www.openbsdsupport.org/gnome-GDM.html
Thanks!
PS: My memory usage is currently 25.7MB according to gnome-system-monitor!
Thank you for pointing that out, that seems simpler than my way, plus the fact that it is written by the OpenBSD team. I will test it and maybe update my tutorial 🙂
Are you certain that you only use 25.7 MB of RAM ?
Thanks for writing this up. I was trying to set up gnome on OpenBSD 4.9 yesterday in a VirtualBox vm (Ubuntu 11.04 as my host system) and clearly missed a few steps. I’ll try following this (with the appropriate changes for 4.8->4.9) later today.
I think you won’t need to change anything but the version numbers, but if you see that additional steps are required for OpenBSD 4.9, I would be happy to see your feedback 🙂
Hi!
I took the liberty of making a tutorial based on your (very simple and giving you due credit), but with version 4.9. Hope you enjoy!
Regards from Brazil!
Hi Rafael! No problem, where can I find your tutorial?
Here! http://barrasbin.wordpress.com/2011/05/08/gnome2321_openbsd49/
Thank you, I’ll check it out 🙂
Hi again Gabriel.
Can you make a tutorial how to install (if possible) Gnome-Shell for OpenBSD 4.9?
I’m wondering it <3
Thanks and best regards
Yes, I will in a near future 😉
Gabriel,
I followed your guide and can use GDM to initiate Gnome logging in as root.
When I use GDM initiate Gnome with a user account, I get the default x-windows.
Any ideas ?
Thanks for the help and the tutorial 🙂
Garbiel,
I have followed your guide. I am using OpenBSD 4.9.
I can use GDM and login to Gnome as root. However, When I use GDM and login to Gnome as a user – i get X-Windows.
Thanks for your help and for the tutorial 🙂
Hi Dave,
By X-Windows, do you mean FVWM?
Did you follow the tutorial step by step? In particular this important step:
nano /etc/rc.conf.local
Append/modify the following lines :
xdm_flags=NO
gnome_enable=YES
gdm_enable=YES
Gabriel
Thanks for an awesome tutorial. I was able to install gnome and log into it.
When I tried it the first time, I was having an issue like some other folks here, where I was getting into the X-Windows session instead of the gnome session. The second time, I realized that I did not select Gnome Desktop at the Gnome login screen. This is mentioned in your tutorial in the Note section “Be sure to…” but it does not show how to do it. (And this is the reason why newbies like me cannot get gnome.) So folks, do this
On the gnome login screen, click Session and select gnome.desktop.
This will take you to gnome session after you log in.
Also is there a script that can be used to add all gnome packages at once instead of adding them one by one?
Thanks again for the tutorial.
Thank you for your remark!
Hi,
thank you for this tutorial,
I use openbsd 4.9 with fbpanel, openbox and thunar.
the only thing missing for me would be an automount for usb pen, I tried hotplugd attach and detach scripts but it didn’t work for me (but it’s possible I don’t understand everything…).
Do you know something simple to handle this?
thank you again
I was wondering…
what the use of editing /root/.profile
thank
Great tutorial!
I’m a very recent convert to *BSD from linux. I tried FreeBSD first, and had a few problems with it (but fewer than with linux), so decided to try OpenBSD. So far, OpenBSD seems to work better on my ancient pentium-4 computers. Both BSD flavors work much better than any linux distro I’ve tried. My file server (another ancient box with a dual-core 32-bit xeon cpu), currently running Debian with zfs-fuse, will soon be switched over to FreeNAS. (Wish OpenBSD had kernel-based zfs…)
A few questions/comments:
ALT_PKG_PATH did not seem to do anything, and it’s not listed in the “environment” section of the man page.
If I set PKG_PATH to be a nearby ftp server, and set PKG_CACHE to be a local directory, is pkg_add smart enough to look in PKG_CACHE before ftp’ing a file? I installed gnome via a bash shell script that used pkg_add with the full uri to each package – the script saved a lot of typing on the command line, but if the uri could be stashed in an environment variable, it would be even better.
What package do I need to install to get gnome-power-preferences (or whatever power management applet is available under OpenBSD’s gnome installation)?
I installed gnome-screensaver, and none of the text-based screensavers (FontGlide, GLtext, some others) work, displaying nothing but a blank screen. How can I get them to display something?
Thank you for such an excellent tutorial.
PS- I’m looking at your website with firefox on one of my still-Debian-lenny boxes, because I have not yet installed a web browser on the machine being used to check out OpenBSD.
it has a slightly different name in the openbsd package collection, with your PKG_PATH set up as root or with sudo do
pkg_add -i gnome-power-preferences
Gabriel, thanks very much, this is a great tutorial, worked like a charm for OpenBSD 5.0 on my t5730 thin client at work with usb mini-disk.
hah, I meant gnome-power-manager
(edit for a time after reply would be nice)
@Jarb Owski: Unfortunately, as of today, I don’t know a solution for the USB pen auto-mounting issue. I am editing /root/.profile so that when I type the “su” command, I can still access the same environment variables.
@Dr. Marvin George: I used the $ALT_PKG_PATH environment variable because I saw other people using it, but I did not search any documentation on it. It is true that I can’t find any documentation about it also. So I wonder if it has any effect. Thank you for your question. For your screen-saver problem, I don’t know the answer as I don’t use them (I prefer to turn my screen off). I will look into this the next time I put my hands on my OpenBSD system 🙂
Hi,
I answer to myself to share with everybody…
I found a program, hotplug-diskmount, for automounting devices an it works great!!!
The very first thing is to install the program:
download the last tarball:
http://www.bsdua.org/files/hotplug-diskmount-0.5.tar.gz
unpack:
pax -zr < hotplug-diskmount-0.5.tar.gz
build and install:
cd hotplug-diskmount-0.5
make
sudo make install
configure:
http://www.bsdua.org/hotplug-diskmount.html
you'll still have to unmount your devices manually but if you let your device plugged when you shut down your machine, it will be safely unmounted.
hope you'll like
Hello guys,
First thank you for the effort you made for noobs like me 😉
I would try to setup OpenBSD 4.9 with then Gnome on my laptop Asus X72JT-TY160V and I cannot because the laptop boots the CD, I have a boot prompt “boot>” some line codes white on blue (2-3 max, can’t read, disapearing then) and the the laptop reboots itself. I try on “boot>” some commands to disable apm as I found on google without success. Could you help me to setup OpenBSD plus gnome on my laptop please? If it can help you Ubuntu 10.04 boots perfectly the laptop but I would have a secured OS as light and responsive as possible, my choice is OpenBSD because of all of this with your tutorial.
Thanks for the great tutor
Thanks for this work.
Please I need a tutorial for openbsd 5.0 thanks
Maybe soon! 🙂
I have used your methods but I fail on dependencies and I have a complete sparc64 system installed and up and running. There appear to be some libraries missing from the gnome-session package.
The tutorial is for a fresh installation of OpenBSD 4.8, there are no missing dependencies. If your version of OpenBSD is more recent, then let me know of which library is missing :). I will probably update my tutorial soon for OpenBSD 5.0.
Hello. Your guide rocks. I followed whatever you say to install gnome on a OpenBSD5.0 The first problem I met is the one with the fvwm during booting which I managed to solve it, the second is that I see very few items on gnome menu (no games and other things) but I’ll check it tomorrow (in Greece now the time is 3:37 am). Anyway great guide keep rocking!
Hi Harris,
Thanks, I will update the guide for the latest version of OpenBSD sooner or later 🙂
Hi Gabriel, thanks for your tutorial. I just installed a fresh OpenBSD 5.0 and I have a working Gnome2 desktop. 😀
Hi there, you’re welcome ! It’s nice to hear that the tutorial is also valid for OpenBSD 5.0 😉
(by the way I should really update it for the latest version of OpenBSD)
That’s a really nice review, everything works. I’m not that new to Unix (About two years of experience with Linux and *BSD, already compiled a lot of kernels, etc) but THIS is really helpful.
Thanks Chris! 😉
Hi,
where is the pkg cache located ? can’t find any results in google.
Hi there,
The PKG_CACHE is located where you define it to be 🙂
Hi, yeah, i guessed it :D, sry, pure newbie, thought there would be a constant place for it. thx for fast responding
I just did this for a fresh install of 5.0 release and it’s a good guideline to follow, but there are a few packages that are newer (I used them just to try). Some of those are also dependencies for the extra gnome packages added at the end, but cause no problems. However, one problem I was having was the same one as Will R above, so I did his suggestion.
I was also having problems with the cache idea since I guess I was running out of space in my home folder towards the end of the tutorial. I used the 5.0 auto partition option during install on a 10GB virtual machine. I just “cleaned” the cache before each package install, but that’s tedious.
I also used PKG_PATH in the format of “PKG_PATH=ftp://your.ftp.mirror/pub/OpenBSD/5.0/packages/`machine -a`/” per the 5.0 manual and no “ALT_PKG_PATH” (didn’t seem necessary).
More/less everything else in similar enough. My next time around, I might make an abridged version of this for 5.0 minus the extra pkg_path and maybe the pkg_cache. I’m not even sure that that entire step is necessary if you configure Package Management like in the 5.0 FAQ manual –> http://www.openbsd.org/faq/faq15.html#Ports
Thanks though. It was enough to get the idea with 5.0 😉
Hi Tom,
It’s good to know that the guide is still helpful for 5.0. But I should definitely take some time to update it to the latest version of OpenBSD.
About the ALT_PKG_PATH, it will still work if you don’t define it, but it might fail. As of OpenBSD 5.0 I don’t know if it is still used. Its purpose was (is ?) to define an alternative package repository just in case the primary package repository become unresponsive. This avoid installation failure in case of automated installations for example.
About the auto-partition feature of OpenBSD, I actually got the same problem: a way too small home partition. I had to edit the partitions myself, or the PKG_CACHE directory would fill the home partition.
Thank you for your feedback!
One billion thanks to the adequate explanation
I benefited from this explanation is very wonderful
You’re welcome 😉
Salut.
Impec sur OpenBSD 5.0 ;).
Hello,
this is the best tutorial around on the internet about the proper installation of Gnome on OpenBSD.
Now this is just my comment on the subject. I think that there are missing some libraries. Because I’ve seen on the FTP mirror these libraries.
libgnome-2.32.1p0.tgz
libgnome-keyring-2.32.0.tgz
libgnome-media-profiles-3.0.0.tgz
libgnomecanvas-2.30.3.tgz
libgnomecanvasmm-2.26.0p4.tgz
libgnomecups-0.2.3p7.tgz
libgnomekbd-2.32.0p2.tgz
libgnomemm-2.30.0p2.tgz
libgnomeprint-2.18.8p1.tgz
libgnomeprintui-2.18.6p2.tgz
libgnomeui-2.24.5p1.tgz
Now, are they installed as dependencies???
Are they really necessary?
Thank you kindly, for your attention. 😉
Hi,
I believe that those libraries should be installed as dependencies 🙂 If not, then I should add them to the tutorial.
And thanks for the “best tutorial on the internet”!
The only problem i had with openbsd 5.0
I changed in /etc/sysctl.conf the above line:
#machdep.allowaperture=2 # See xf86(4)
to
machdep.allowaperture=1 # See xf86(4)
definitely best tutorial for OpenBSD… 5.1 also works with updated packages
THANK YOU
Hi could you explain how indeed you get Gnome works over OpenBSD 5.1 without gdm in the available packages ? I’m understanding that you have a workaround , go further please , explain it .
My tutorial was written for OpenBSD 4.8. I guess that they now use Gnome 3 in 5.1 and so the gdm package is not available anymore. I’m willing to update my article, but I lack of free time.
You are saving people from pain and lot of research.!
Thank you MUCH MUCH!
help us with a “install gnome 3 on openBSD5.1” tutorial. pleasee
I tried to install gnome 3 on openBSD5.1 and the diference with your tutorial is that gdm is no more, now it is gnome and no more.
thank you and sorry for my bad english
Hi!
Sorry for my tutorial hasn’t been updated for a few releases of OpenBSD. I should definitely update it. Meanwhile, try using the Slim login and window manager.
for 5.1 you can use slim with it.. as gdm yet to be incorporated..
Yes i agree with that, Slim is a great login manager!
http://en.wikibooks.org/wiki/Guide_to_Unix/BSD/OpenBSD/As_a_Desktop#Xfce_.284.4.29